Sunday, June 16, 2019

First attempt at winter camo for AFV's

One of the things I have always loved are WW2 tanks modeled to look like they've been whitewashed for winter. I have also been very afraid to try it but recently thought, what the hell? The worst that could happen is that I primer over the failed attempt and paint the model again. So, I did a little research online; checking out different photos and even watched a video on some guy's process. (Which was insane; I'm just wanting to make models to play with, this guy was a professional modeler.) I'm not trying to win any awards, just not be embarrassed by what I put on the table.

Considering the debacle of my attempt at pea dot camo, I approached the project with a fair amount of trepidation. Armed with the minimum amount of knowledge, as is my MO, I forged ahead.


Here's the real deal. A Tiger 1. I picked this picture because it shows how they left the tank markings readable. Understandably, this is important but it had never occurred to me before starting this project.
Other old photos show how the whitewash would run off after rain and mud and weather took it's toll. That was the look I was going for.


Here's a pic of someone else's model showing some of the fading. This is a good example of what I wanted.


Here's my two attempts. Unfortunately, the pics don't quite pick up the whitewash too well. It looks a lot better in person, not so thin and uniform. I purposely made it more worn in places but it's hard to tell here. The markings and insignia are much more exposed than the rest of the cupolas but you can't tell in the photos.


So, a scary thing happened. I wanted to put the whitewash over another camo scheme so you could see it under the whitewash, but when I finished with the first part, I really liked it! I was afraid to paint over it and ruin it! I came this close to changing my mind and just leaving it as it was, but I'm glad I decided to carry on. I think the wheels are the best part.


The MkIV looks much better in real life.


I like big butts and I cannot lie!


I purposely wanted it to look 'sloshed' on. I read where often they would use a mop to apply the whitewash so I didn't want to paint it with a fine brush. I am happy with the way it turned out.


I really like the deck of the Panther, especially considering it was my first attempt.

Overall, I am very happy with the results. So much so that I have decided to do the same to one of my M4's and one of my T34's. Of course, the rabbit hole is I've already ordered troops in greatcoats because you can't have them in summer uniforms, right? And their bases need snow, right? Why does every idea I have cost me several hundred dollars? I will contemplate that question while I plan a Battle of the Bulge scenario; probably around Bastogne and Those Damn Engineers!

Bonus points if you know the significance of the marking numbers. (BTW, every number on every vehicle of mine save one has a specific meaning. The one that doesn't has 1's in it because I couldn't fit other numbers in the space. Haha.)

Monday, June 10, 2019

Playing with Myself

Over the course of a few evenings last week, I set up and played through a game of Pikeman's Lament, the pike and shot version of Osprey's Lion Rampant game. Having only played the latter game once, I was curious to see how the former measured up. I actually owned PL first, and was so impressed by the rules that I bought LR. But sometimes rules work differently on the table than they do in the book, so even though I like LR, I still wanted to give PL a go.

Back when I purchased and read through the rules, I was a little bummed because having read them, I knew it was going to cost me a bundle of money and a fair amount of time before I could get enough troops painted to play. Then I remembered the hundreds of 15mm figures I had for the period, from ECW, to TYW to GNW to, well, you get it. I had them all based for games I am likely to never play again, so I re-based some of them on washers (not pennies this time because I wanted them to be magnetic). Soon, I had way more figures than I would need for a proper 24 point game; in fact I had enough for at least twice that amount. I shrunk the table from 6x4 to 4x3 and inches to centimeters and was set up in no time.

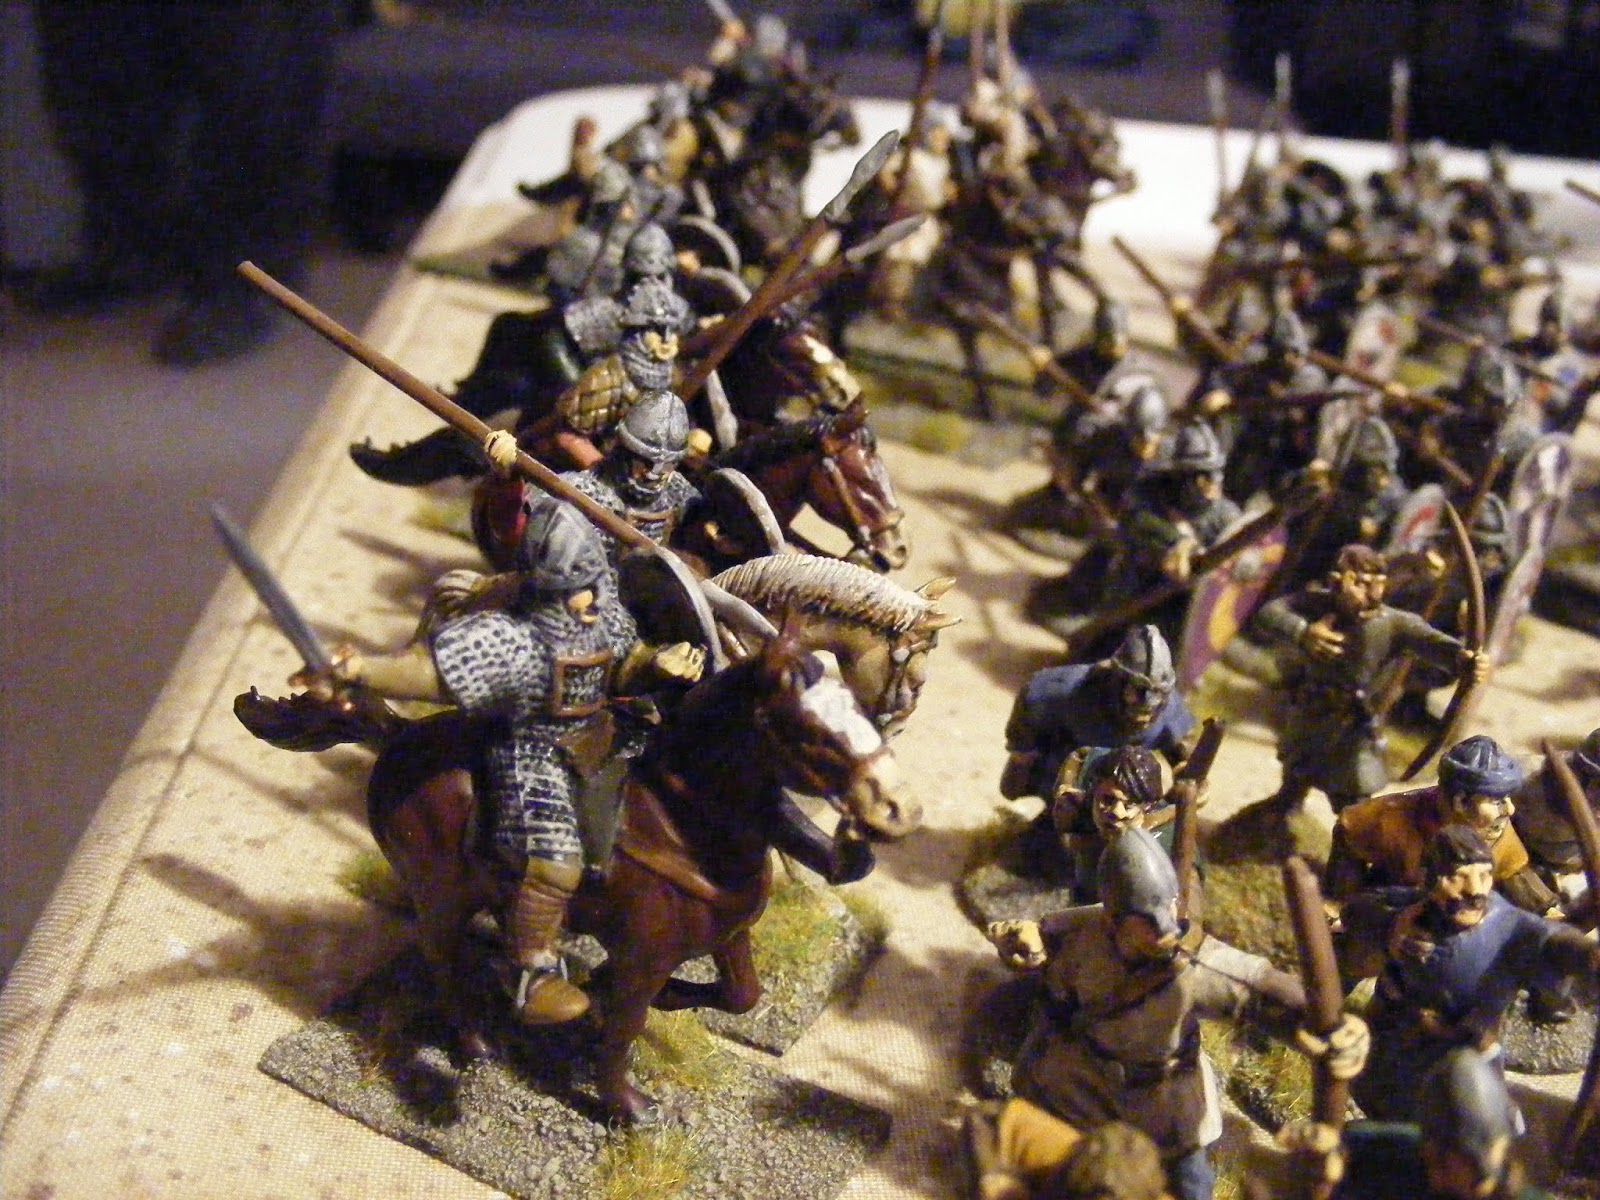
Naturally, most of the troop types are different from Lion Rampant. Gone were the Mounted Men-at-Arms and in their stead 'Gallopers', think those long haired English Royalists (the mounted chivalry/nobility), cavaliers, if you will. Also present are 'Trotters', the ubiquitous cavalry of all armies of the period. Wearing a buff coat and lobster pot, armed with several pistols and a sword, only their colored sashes differentiated them from each other on the battlefield as almost always, both sides would field large numbers of them. Also, you'll find the Forlorn Hope, Commanded Shot, Dragoons, clubmen and clansmen. And of course, the troop types for which the period is named: pike and shot.

Each with their own special rules, some familiar, like 'Wild Charge' and others that were new, like 'Caracole' and 'First Salvo'. Caracole is especially well done, I think. Specific to Trotters, the rule allows the unit to shoot at a selected target and if the shot causes a change in morale status, then the unit gets a free activation to charge home! Awesome, simple way to reproduce their actual battlefield role: shoot, shoot, shoot until the enemy is disorganized and then charge with swords drawn!

The mechanics are the same: each side tries to activate one unit at a time, needing different numbers depending on whether they want to move, shoot or attack. Once an activation is missed, play proceeds to the other player until he also misses or activates all his units. In this way, you never know how many of your units will do what you want them to do, and often, as this game illustrated, your side would do nothing at all as the first roll would miss activating a unit. It must have happened at least six or eight times. In fact, it's a good thing I was playing with myself as the dice were SO bad! I lost count of how many times I would shoot or attack and just totally whiff.

So for this game, I played a simple scenario: two forces who run into each other while scouting a village out to get supplies/food.
The forces featured Scottish Highlander Royalists vs Scottish Covenanters in a 1st ECW dust up near the Scottish border. 


The initial set up from behind Parliament's lines.


And from behind the Royalists'.


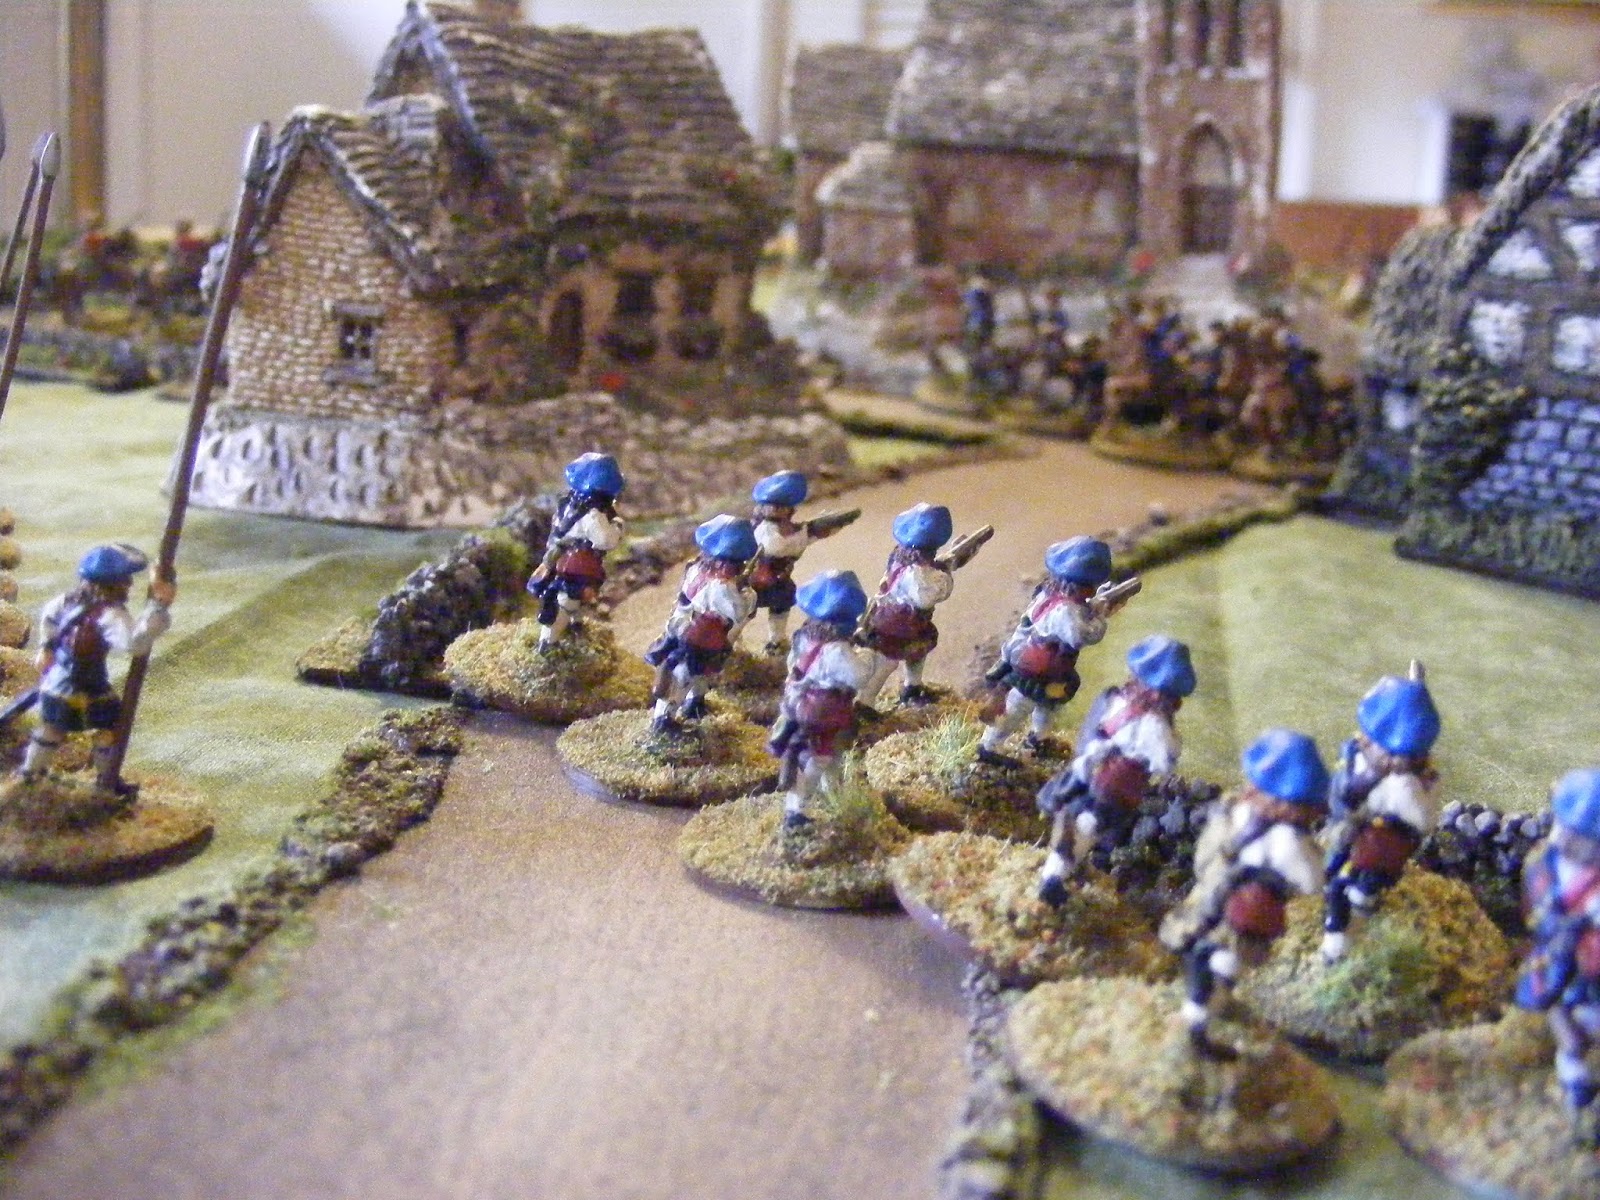
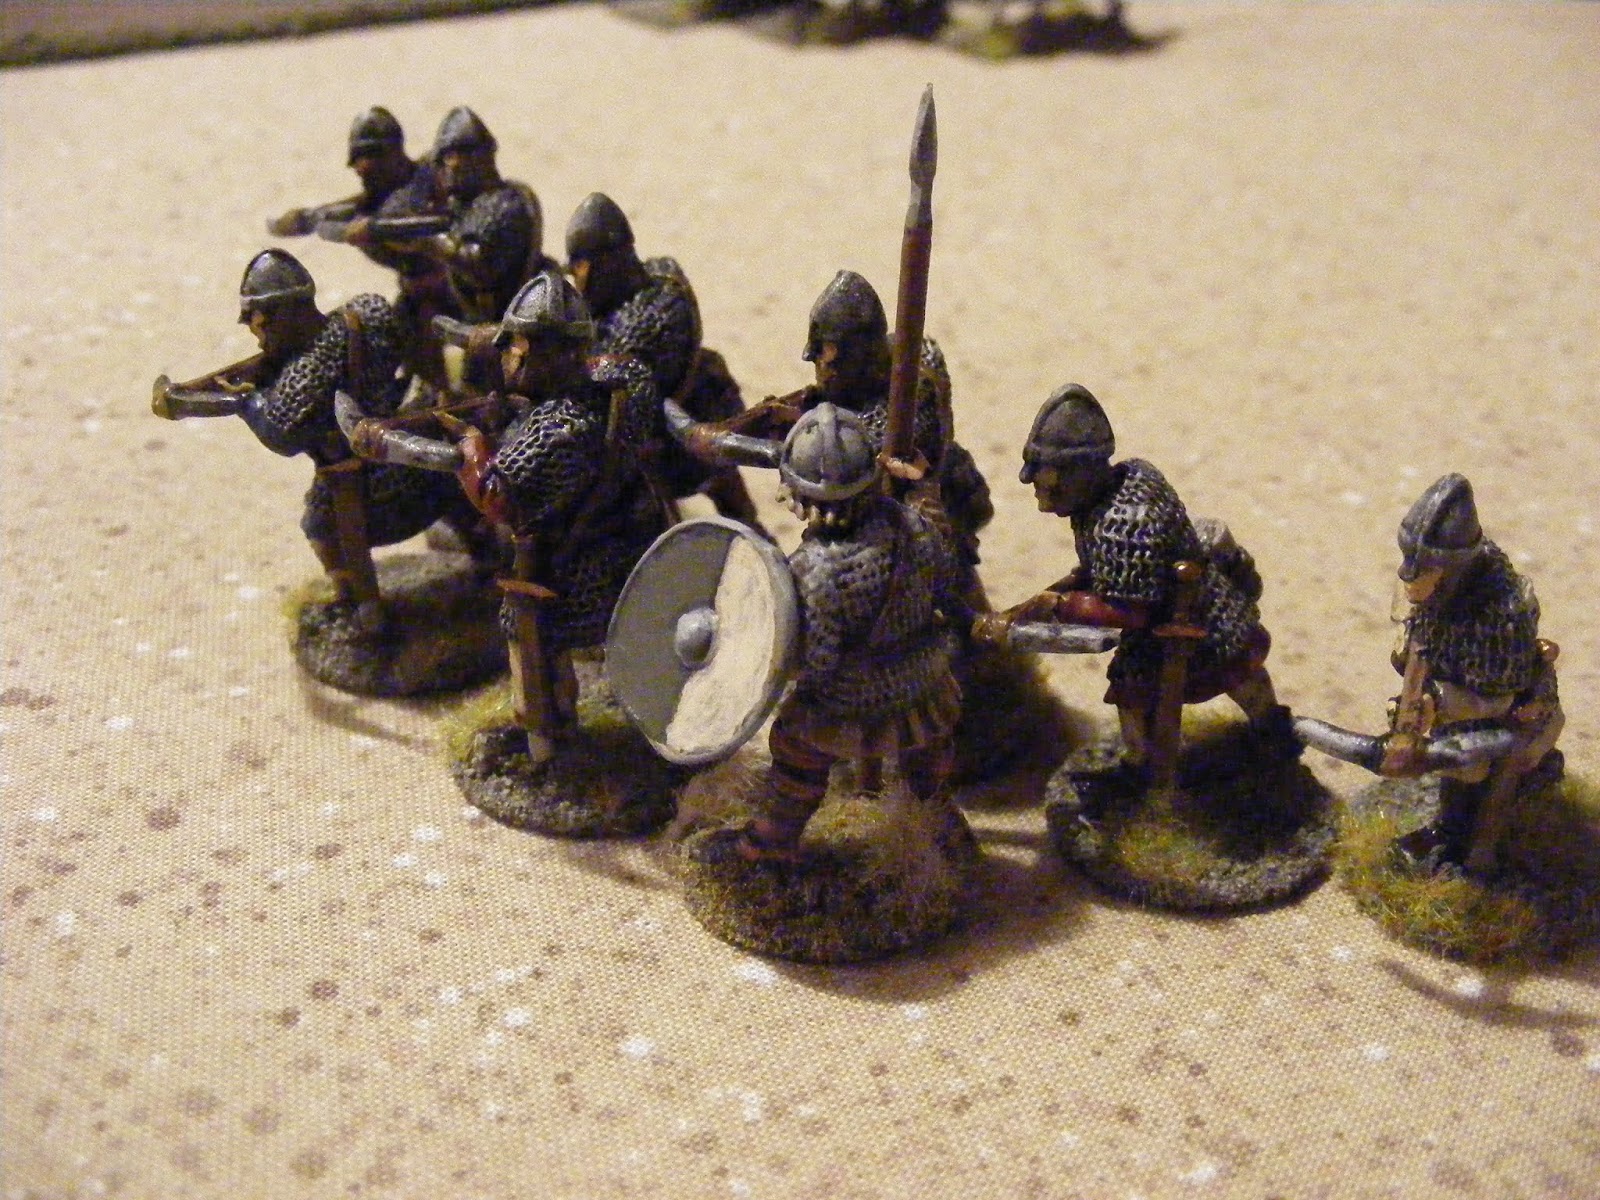
Scottish Commanded Shot in their blue bonnets. The sides were pretty similar. One difference was I opted to downgrade the Royalist Gallopers to 'raw' which gave me the extra point to pay for the Commanded Shot.


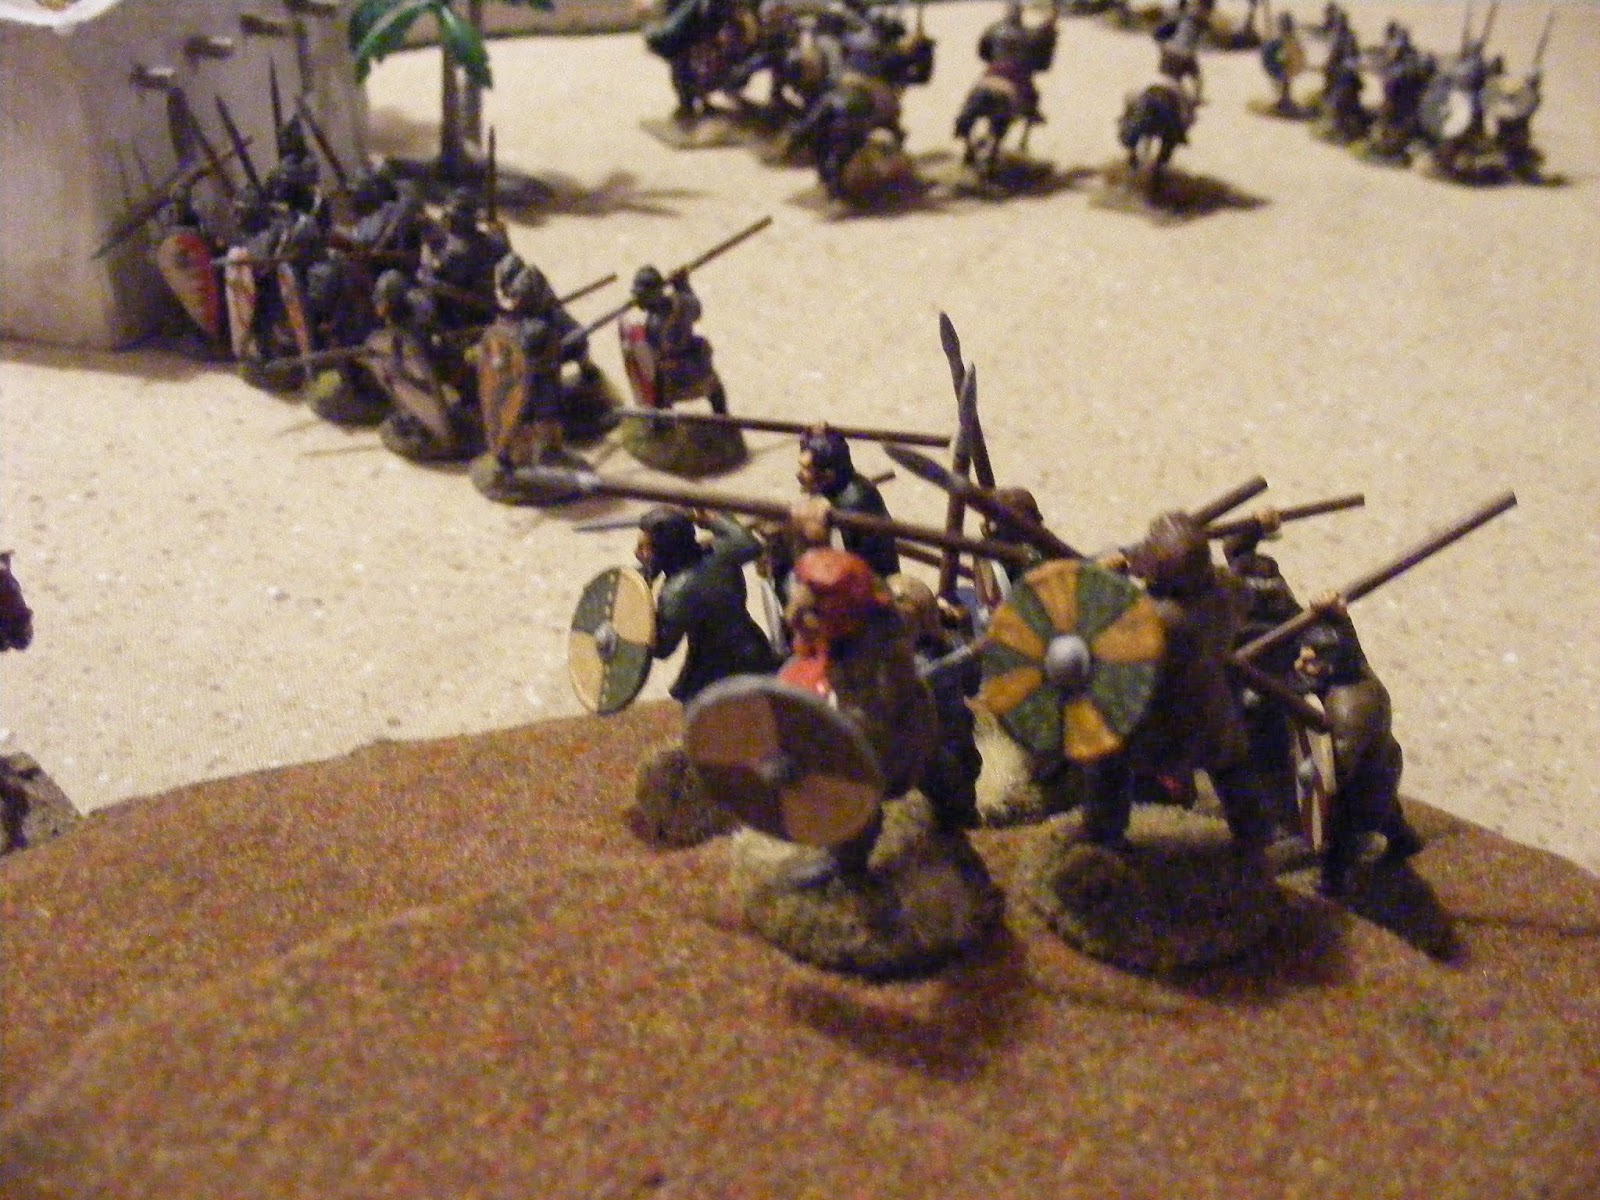
Highlander pike and shot move into the village providing mutual support. In the back, you can see the Scottish lairds, armed with lances, (these are the downgraded Gallopers.)


Meanwhile, Parliament forces approach the village, led by their dragoons.


Covenanter Trotters, pistols at the ready.


The Dragoons gallop for the village and take advantage of the improved cover it will provide.


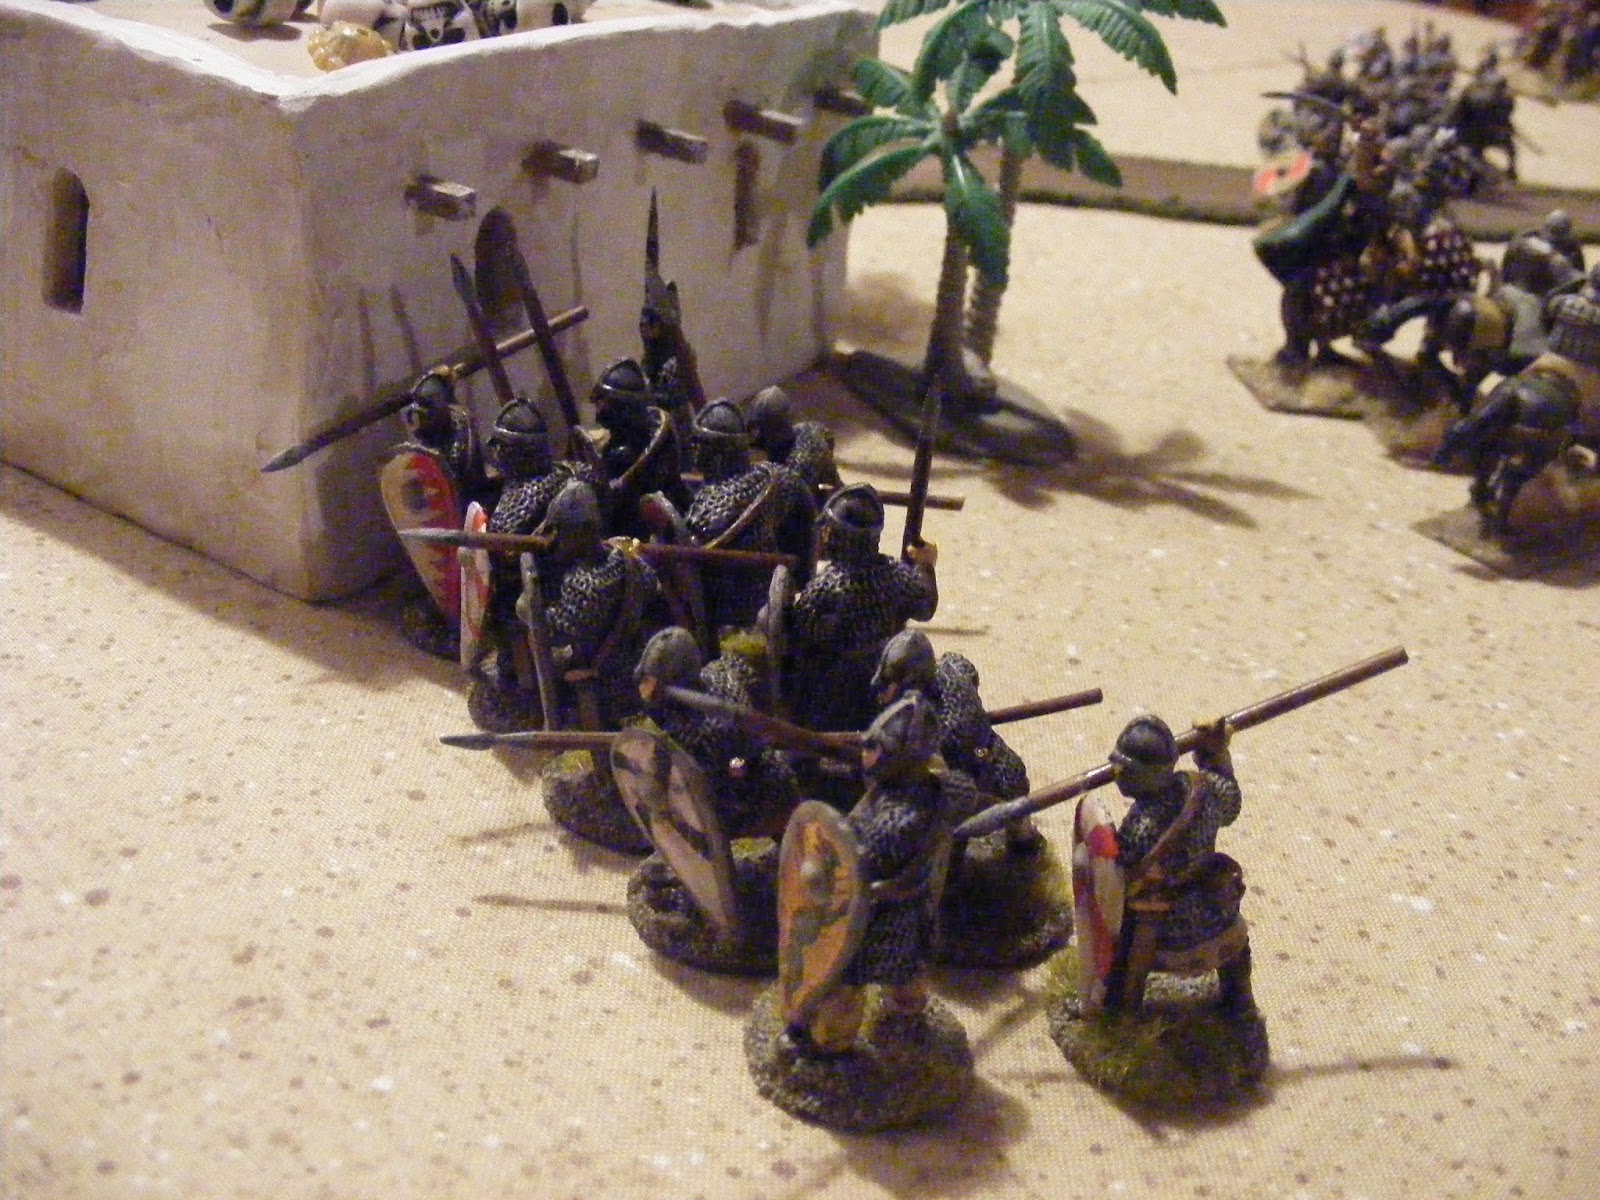
Their Royalist counterparts take cover behind a wall and hold down the Scottish left.


Entering the village, neither unit of Dragoons have the range to shoot at each other yet.


The Commanded Shot (and ad hoc unit put together for some specific purpose depending on the battle), are tasked with covering the Royalist right. The Royalist cavalry and clansmen intend to sweep that way while the pike and shot hold the village.


Looking over the highlander Shot's shoulders. The figures are Museum Miniatures, btw. I bought a shit ton of them when the U.S. distributor sold his inventory a while back. I paid $0.10 each!


The Commanded Shot open up on the Covenanter Trotters. Missed.


As it was the first 'shot' of the game, I felt it was worthy of two photos!


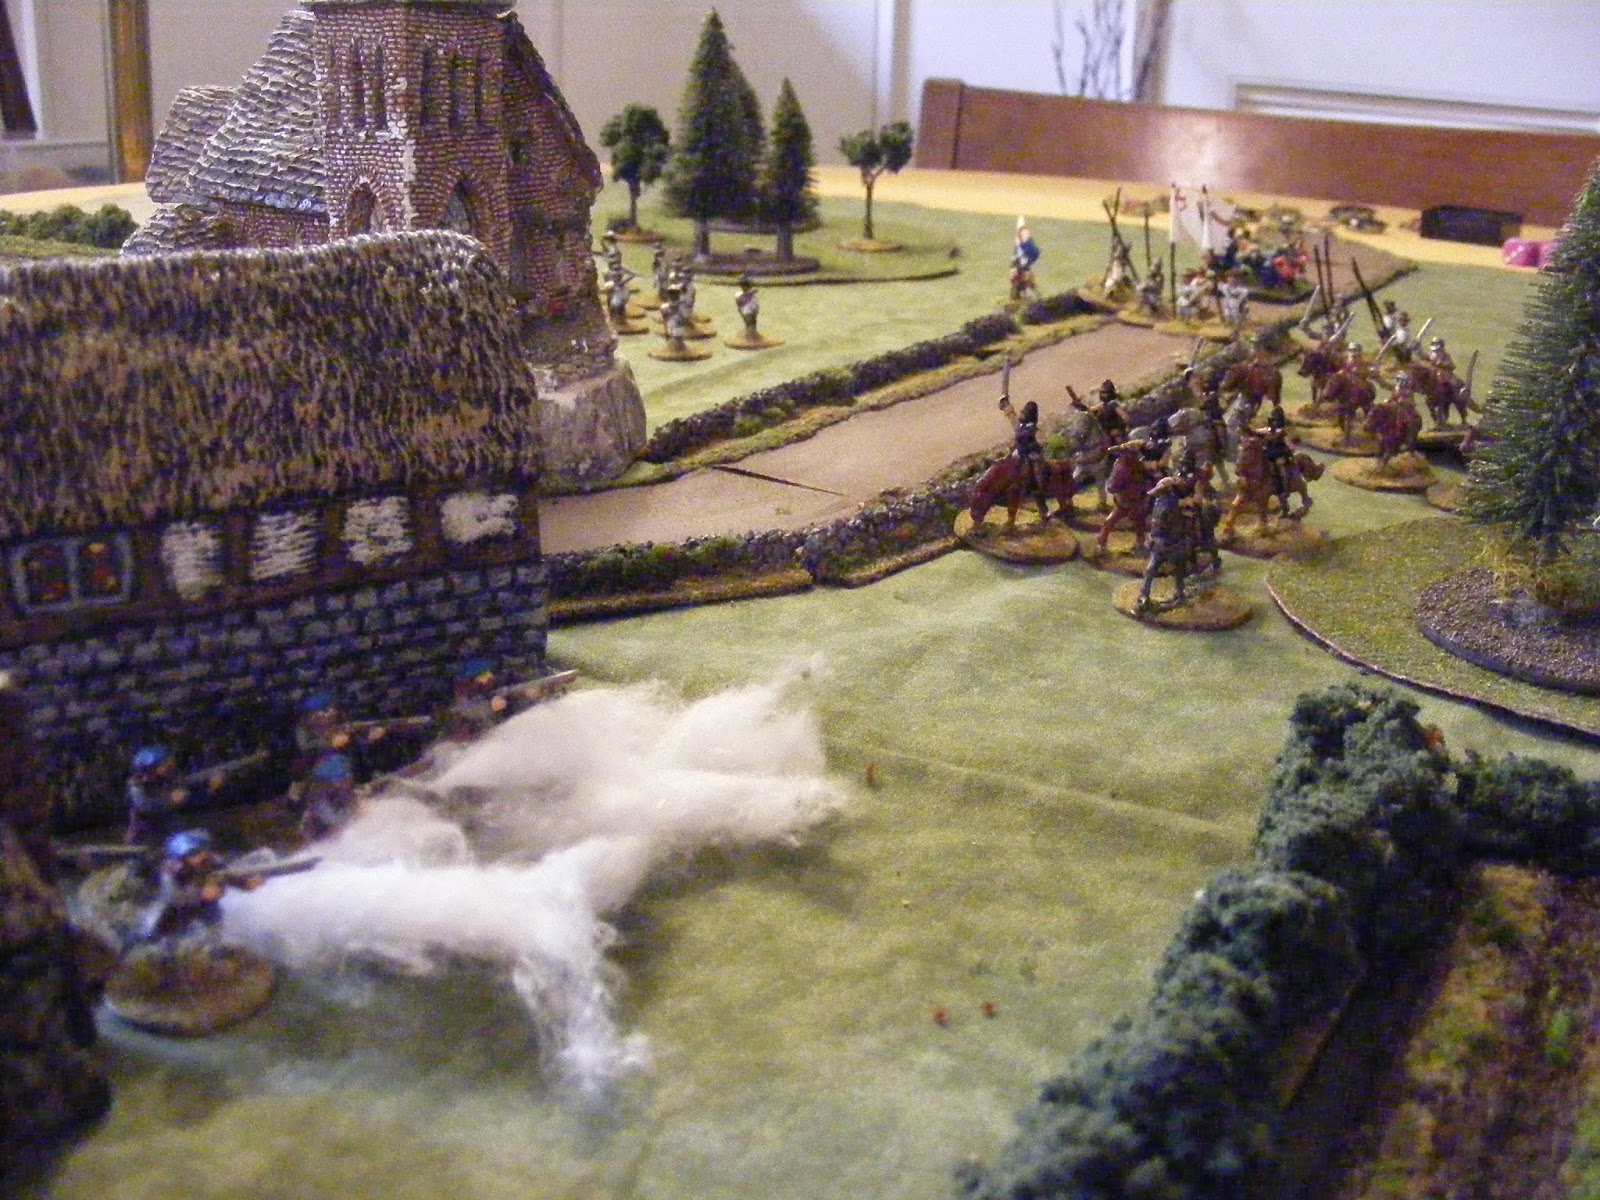
Then the Highlanders fire their important First Salvo at the enemy dragoons! Missed.


This shot shows the Covenanters plan. They've decided to send all their horse into the village, blow through the Royalist foote and emerge on the other side. Great plan! (Except it included dice.)


Another shot looking into top of town. Dragoons, Trotters and Gallopers prepare to storm through town.


And Parliament's shot also looses it's First Salvo. Missed.
Seriously about the first half dozen shots failed to remove a single casualty. Should have left the nerf bullets at home.


It became so bad that the Royalist Dragoons actually charged their Parliamentarian counterparts rather than try to shoot!


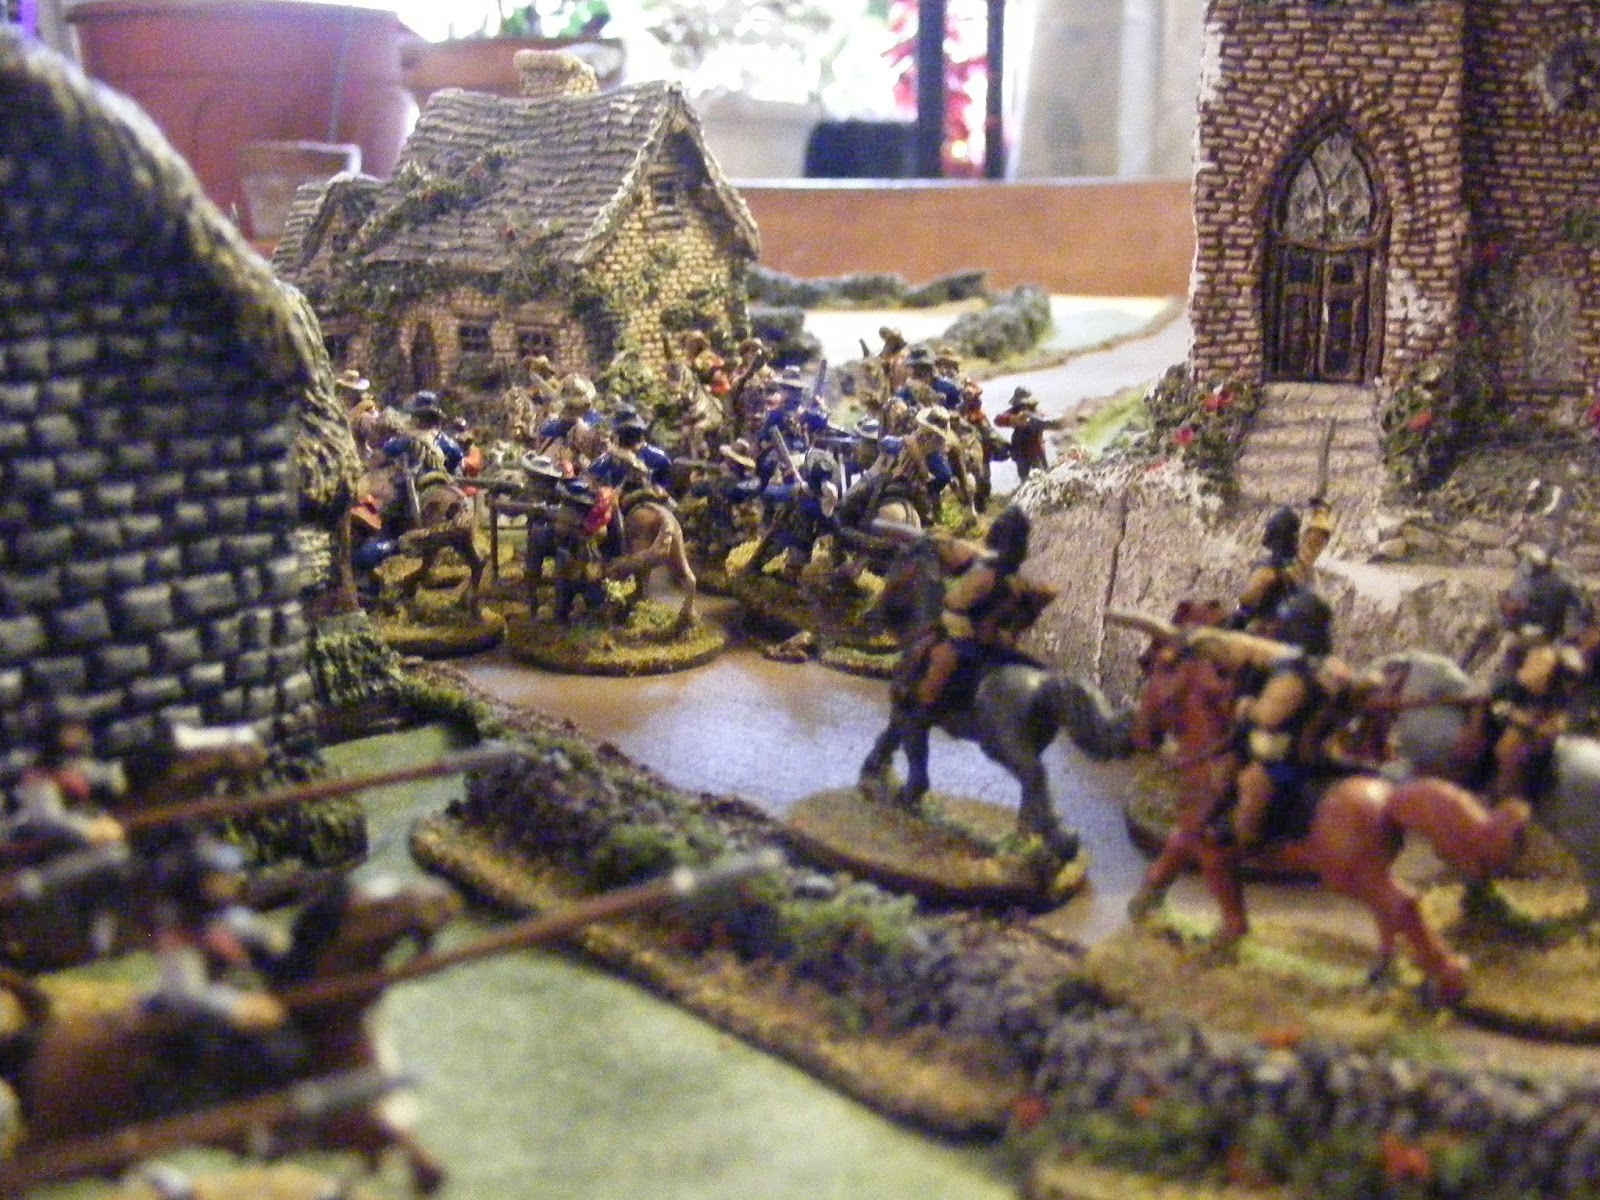
A real donnybrook ensues. The most important part of this shot is the Scottish Gallopers have made it all the way into the flank of the Parliament's horse after multiple failed attempts to activate ANY of them!


Another shot of the same action.


Yay! It took about a hundred combat rolls but someone finally drew blood! The blue dragoons retreat.


This shot shows the aftermath of the first implementation of the 'caracole' rule. Parliament's Trotters, seen here just left of center, FINALLY activated and shot the shit out of the Scottish lairds, causing them to take casualties and Waiver. This allowed the trotters to then charge home and kill a few more. You can see the remaining two skedaddling out of town! Then the Royalists opened fire and men and horses began to fall.


Parliament's Trotters eat a volley from the Commanded Shot.


The Dragoon fight continues to rage in the village.


Scottish shot joins in and Parliament is retreating all over.


Trotter vs Trotter.


Scot Highlanders with guns, what were they thinking? What will they give them next? Whiskey?


After the Royalist Trotters all but dispatch their Parliamentarian counterparts, they are charged by Covenanter Gallopers. And the whole Parliament plan officially falls to pieces.


Still the blue dragoons survive though, even after charging the Scottish shot. In fact, the Dragoons retreated them back to the edge of the village.


The Covenanter horse is hurting. Only one Trotter, Waivering, remains and their Gallopers great charge wasn't so, uh, great.


And everybody fired at the lone Dragoon and STILL couldn't kill him. He ended up failing a Morale Check and disappeared.


Parliament's Shot fire into the village but there's too much cover to do much good. I'm telling you, I have not seen such lame dice rolling, over a period of three days, since the last time I went to Cold Wars!


With Parliaments horse all gone and down to only their pike, shot and regimental gun (which never got a chance to fire), I called it and I called it a resounding Royalist victory. neither pike unit ever engaged the enemy and the Scottish clansmen (bottom center) never swung a clay-more in anger. Sigh. But that's why I'll play it again!


The summer grasses,
For many brave warriors,
Aftermath of dreams.

The game system continues to impress. Does it really differentiate itself from the medieval version? Yeah, I think so. Does it simulate pike and shot warfare? No, of course not. No game simulates anything other than chubby old guys playing with toy soldiers. And you know what? That's fine with me.  Don't let your own ego fool you, that's why we all got started doing this in the first place! This is a game (system) perfectly suited to a night of light fun playing with your favorite toy soldiers. No 'heavy' rules; no real opportunities for rules lawyering; in short, no stupid shit. 
I continue to highly recommend the game.

Monday, April 8, 2019

Lion Rampant in the Holy Land

Got together with Chris, his son Nathaniel and Ogre Dirty Dog for our first game of Lion Rampant. I had heard lots of good things about the game and watched several games being played on YouTube before I finally decided to pull the trigger. Plus, at something like $16, I figured it was worth a shot in buying the rules; hell, I've had hamburders that cost more.

The game appeared to have what appeals to me: quick and simple, without being simplistic. A fair amount of decision making goes into each turn, yet it doesn't bog down the game in a quagmire of rules. I won't go into the specifics here as that is not why you are here, plus there are plenty of sites which would and do do a much better job than I in explaining the virtues of this fine game. (Heh heh, he said 'do do'.) I was hoping for a alternative rules set to Pig Wars. We really like that game, but a change of pace is nice; we don't want to play the same rules every time we get together.

Our biggest issue was we had 4 guys and we're not pussies. We didn't want to play an 'regulation' size game as suggested in the rule book and each end up with a handful of dudes; we each wanted our own 'regulation' sized retinue. However, there being no rules in the book for multi-player games with these parameters, we just wung it. We added several tweaks, including shortening the 3" between units to 2" just because the table was so crowded, especially at set-up. We also allowed the Crusaders to go first and the turn order was both Crusaders, then both Saracens. In that way we hoped to mimic the Igo-Hugo turn sequence as outlined in the rules.

Each Christian player had a 24 point retinue and each Musulman had 23 points. (Maths are hard. I added wrong for the Saracens.) We randomly chose sides and it ended up being Chris and Nat as the bloodthirsty, jingoistic, imperialist and un-Christ-like Crusaders and Ogre and I as the Good Guys. The Crusaders were hard hitting, if slow, and the Saracens had lots of shooting and mobility but not so great in a straight up fight. In a happy accident, the make up of retinues mirrored history in that many of the Crusaders were on foot, probably after having their mounts shout out from under them during an impetuous charge, while the bulk of the Saracens were mounted.

The scenario charged the Crusaders with delivering a Christian princess to her betrothed who happened to live all the way across the board. She must remain with the same unit throughout the game and cannot be passed around like the whore she probably is. (At least that's how she's painted.) The local Mohammedans were charged with stopping her delivery and preventing a marriage which would weaken their position in the local politics.

So, without any further horseshit, off we go:


The desert oasis village of Alrijal Aldhyn Yuhibuwn Almaeiz, an important way-station for pilgrims on their way to Outremer. Both the Crusader retinues will start at the corner in the top middle and must needs exit the princess off the road in the fore ground. The Good Guys will start in the two corners, top left and bottom right, not in the frame.


"On a dark desert highway; cool wind in my hair..."


These awesome Middle Eastern buildings were made by Chris from Sculpy (?). I love them and they look great!


My Saracens lay in wait.


Our leader, Hu Aladhi Yartadi Sarawil, on his charger. He will lead the only Musulman heavy cavalry (Mounted Men-at-Arms in game terms.)


The Crusader knights. (Also Mounted Men-at-Arms.) There were two units of these guys and one unit of Mounted Serjeants.


The other unit of Knights. They rather liked it exactly where they are.


Imagine frightening ululations. The Good Guys had several units of mounted yeoman with bows, who proved to be massively effective. (Again, it's nice when a game works a bit like real life.) These guys up front are armed with spears.


The Mounted Serjeants with their little princess.


The knights are chomping at the bit; enough of the freakin' rules explanations already, let us fight!


The Saracen strategy is to trade space for time. Keep in front of the Infidel and shoot, shoot, shoot.


All my cavalry races to get to the cover of the village. A unit of Ogre's already got there. Meanwhile, Chris and Nat's Activation rolls (to move) were horrible to start as evidenced by how far they have moved compared to us.


A view behind Ogre's command. He had two units of the horse archers. With their ability to Skirmish *and* Evade, they proved to be deadly. Every time a Crusader unit got close, they just skedaddled, but not before launching a volley into the Frankish ranks.


Our first Wild Charge ever! The Saracen heavy cavalry runs willy-nilly into a unit of Foot Serjeants, killing three but losing one of their own. Allah Akbar!


Ogre's cavalry firmly entrenched in the town. That +1 to your armor from shooting while in cover is a huge advantage. It will help against Nat's very powerful Crossbow unit. They hit on a 4+, the best missile unit in the game in terms of damage. Turns out we needn't have worried. (More on them later.)


OK, hard to explain but here's what happened. During the Crusader Activations, they moved the Foot Serjeants (partially hidden behind the palm trees) forward and then the Mounted Serjeants to where the Foot Serjeants were. During the Arab turn the heavy cavalry Wild Charged again, this time into the Mounted Searjeants with the whore, uh, princess. Almost got the little hussy too, but she and the what was left of her escorts escaped!


Ogre's echelon of Mounted Units. He had them working in well oiled caracole as each would shoot and then move out of the way for the other. Nicely done, Craig.


I love this picture. The Foot Serjeants secure their flank against a building and wait to give someone the business. In the background you can see the Mohammedan leader and the rest of the heavy cavalry. They would not be there much longer. The good news is they have probably deflowered half (FRD) of their 47 virgins by now.


Crusader schleppers take the high ground. Turns out lots of guys with bows and arrows can see you there.


Told you they liked it there. Chris' units of knights didn't activate until halfway through the game. In reality, the dice favored us all game long without question. But then again, we are the believers of the True Faith, are we not? 


My horse archers executing the perfect Evade tactic. They backed up across half the board, peppering the Franks as they advanced. It took about 10 turns before they failed their first Evade test.


Bidowers head to the roof for some easy pickings. (They already killed a knight with four 6's on the first shot of the game!)


An overview from behind the Crusader lines. They are pushing into the village, but at what cost? Check out Chris' knights.


Frankish Men-at-Arms force the Good Guys out of town, but not before a few fall to Saracen arrows. Allah Akbar.


These Bidowers are in excellent position! One would think anyway. They were on the roof for three turns and never got a shot off. Never even got a chance to Activate. Allah's ways are sometimes unclear to the Faithful.


Franks running through the streets killing anything alive: man, woman or goat. It's what the Savior would have wanted.

OK, so the next two pics need to be seen in order because it looks really funny.


Crusaders envelop the village. If you look on the left you'll see a unit of Foot Serjeants heading up the steps. If you look closely though. it looks like they are kind of tip-toeing up the stairs.


Then, BAM! Like a scene form The Life of Brian they come charging onto the roof top! Haha, I think that's funny. By the way, in true Crusader fashion, they massacred the Bidowers without mercy.


The bulk of the Saracen cavalry has not been touched and forms a line between the Crusader position and their destination.


See? Lots of the swarthy buggers.


This unit deserves special mention. These are Nat's crossbowmen. On paper, the best missile unit on the board: eighteen inch range and a 50/50 chance to hit with 12 die rolls; not too shabby. The reality was quite different. Needing a '7' to Activate to Shoot (average on 2 dice, mind you), they failed their Activation a MINIMUM of 10 times! We actually lost count. Like we said, their dice sucked pretty much all night. (Allah Akbar.)


It appears the Saracen tactic of trading space for time worked as the Mounted Serjeants turn tail and head back the way they came. To quote The Glimmer Twins: 'There'll be no wedding today!' Allah Akbar.

So, our first game was a success. Everyone seemed to like the rules. It satisfied what we were after: it played easy and was fun, no rules headaches and it all seemed congruent mechanically. The term 'elegant' is thrown around a lot in gaming but, despite this game's 'small stature', the rules epitomize elegance in game design. It played as a fluid, dynamic sequence of events. The Activation mechanic served to provide real tension. You know it's fun when someone dices to Activate and two people cheer and two people groan and curse!

A fine game!