Thursday, October 25, 2018

Sus Bellorum Britanniae

Ah, Pig Wars in Britain.

Friends and family gathered to play a Dark Age brouhaha over the weekend past. The game was Pig Wars; the scenario pitted numerous wandering warbands bent on pillaging a Roman villa in 5th century Britain. Food on the hoof, and who doesn't like killing bloody Romans?
There were 5 warbands and 5 starting points. Each warband was slightly different, but each offered  aspects to make them attractive to the players, from extra shooting, to mounted troops (an attack bonus) to guys with two handed axes. What we did was randomly determine 'picking order' for the warbands and then reversed the order for picking starting points, ala Settlers of Catan. So Nat had the first choice of warband but the last choice of his starting point.
Each warband would be awarded points for getting livestock off the board and killing dudes, plus score points for secret Victory Conditions I invented, also randomly selected. Some examples of the secret VC were extra points for killing 'a guy with a chicken' or extra points for 'killing guys on the roof of the villa *if* you exit a goat', and so on.
I would play the Romans again who were there only as obstacles to the players' designs and could score no points of their own.

We also added a new dimension: we used old Warhammer direction dice to randomly move the farm animals each turn. That way, they didn't just sit there and wait to be picked up. It worked out pretty well, as they sometimes would run in a different direction just as someone was about to grab them. Just an extra bit of fun.

So, each player having selected their warband and starting point and armed with a special purpose, let's get started!


The villa. I picture it wet and muddy, like I do the entire earth from the 5th til the 15th century.


The 'house' and barn. More of a barracks than a house, it would be revealed as the game wore on.


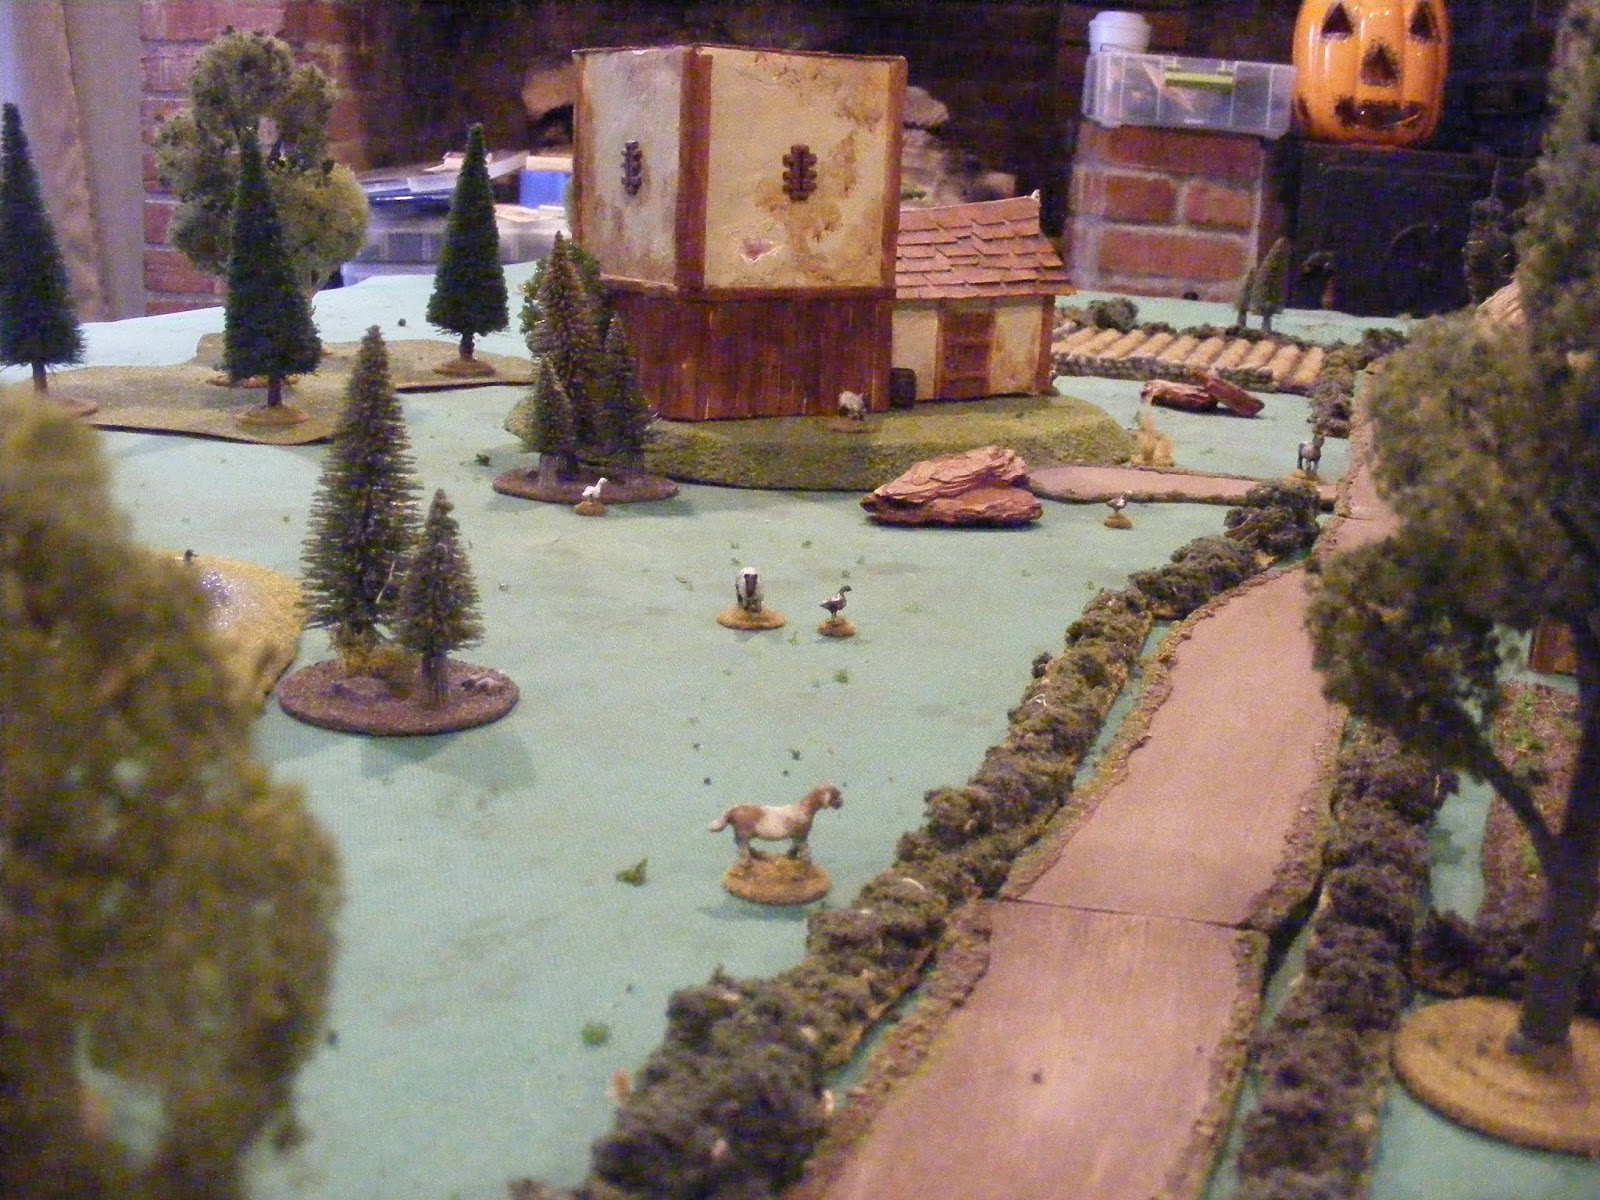
The fortified manor house. In hindsight, it would need a lot more fortification.


Tony, Nat and Ogre Dirty Dog fondle their warbands, getting ready to high tail it onto Roman property without so much as an invite.


Tom aka 'Thakules' also sets up his warband. His guys would prove, let's say, opportunistic, as they strolled into battle and cleaned up the remnants of several bitter conflicts.


Tom's troops moving inexorably forward. (That's Latin for 'slow'.)


Chris' warband schleps through the muck. That duck never knew what hit him.


Ogre DD's warband has no qualms about ruining anyone's day. The  head straight for the barn and the highly prized horse.  


But the barracks reveals the first of the sleepy Roman defenders forming a shield wall to stop them. Unfortunately they had no time to don their armor.


Not so these boys. The Roman centurion and his Legionum Sanguine Fructos forms up outside the villa. They are sick of this provincial life and welcome a fight. Careful what you wish for, fellas.


Nat's warband comes in waves. They lost a few guys on the way in to bow fire but were on a mission.


The Romans engage Ogre, providing him with many victory points as they were apparently swinging nerf swords and were pretty much butchered, setting a frightening precedent for the home team.


Nat's shield wall closes with... a sheep? 


Wait for it... 


What's left of the Roman shield wall runs for his life. There was another 4 man shield wall hiding in the barracks but Ogre smashed them as well, leaving a lone peasant holding his chicken.


Less archers on the roof than a few turns earlier. Those guys were arrow magnets while they lived.


An important shot. This is Chris' guys about to exit a chicken, a goose, a duck and a sheep, which is 4/5ths of his secret VC. For a whopping 7 points he needed to get each of the above off, plus a goat. He did it too, through careful negotiation and a non-aggression pact with Ogre. (Until he reached his goal and then turned on him.) Well done Chris!


Nat's armored shield wall clashes with the Legionnaires. His two handed axes would break the Romans until they were fighting in a few separate knots. 


Wait for it...


Now! 

Tom's warband gets into the fray, cleaning up what's left of the bloody Romans. (The dirtiest kind.) The Roman centurion finally goes down after a Popeye/Bluto type fight with Nat's war lord.


Tony moved his warband in well measured temperament.


Two Saxons fight over their girlfriend. 


Final positions, not too many dudes left. You can see Chris' and Ogre's warlords engaged in mounted combat between the barracks and barn and Nat's and Toms also engaged in front of the villa. Lots of warlords took wounds but only mine died. :-(
But, the Romans had one guy survive! The priest was hiding in the villa and no one entered to brain him.


It was a close run thing. After tallying the points, Ogre Dirty Dog emerged victorious, edging out Chris by a single point. The rest of the pack were separated by 6 points and first and last place separated by only 11 points. Very close and well played by everyone.

Pig Wars is a great 'convention style' game. It allows multiple players to have a good time. The use of playing cards over dice is a great equalizer as well. It's an old game but holds up well. We recommend it.

Else, how can you answer the question when you are an old gaffer and you grandchildren ask: 'What did you do in the Pig Wars, grandfather?'

Tuesday, October 23, 2018

Battle of Piva Forks

It was time to dust off the Bolt Action dice and get some gaming in. This time, however, we would travel to the Pacific; Bougainville to be precise, and break the cherry on the IJA and USMC figures.

The actual scenario was inspired by real life events of 20th November 1943, when a patrol led by 1st Lt. Steven Cibik was tasked to hold the high ground along the Numa Numa trail on Bougainville. But instead of trying to recreate it exactly, we decided to use it as inspiration only and use the Maximum Attrition scenario from the rule book. It's a simple scenario: kill the other guys. Each side got one Victory Point for each unit they eliminated. 6 turns, with a 50/50 possibility of a 7th. Perfect for our purposes.


The table. In accordance with my new effort to have 'cleaner' looking tables, I eschewed lots of  'realistic' ground cover for what you see. Simpler and, I think, still giving the effect of jungle. 
I hope.


The Bolt Action crew: Chris, Tony, Nat and Ogre Dirty Dog with young Master Anthony in front.


The first squad of USMC enters the table and the game is afoot!


Tony and Chris wisely use one squad to shield their valuable flame thrower team in the advance forward.


The US strategy was to probe heavily on their left flank and hopefully outnumber any enemy resistance they may encounter. Here are several squads and a .30 cal machine gun advancing through the light jungle.


IJA grenadiers advance cautiously. Their 'knee mortars' would provide quite the punch in close support.


The Japanese players chose to enter across the length of the board, although they also sent two squads on a flanking mission. Here the 81mm mortar and sniper set up on the high ground on their left flank to support the general advance.


Their lone MMG also takes the high ground, but on their right.


USMC .30 cal redeploys into the dense jungle near the river.


The Marines begin to take fire from across the river. Several squads seek the cover of the dense jungle while a third covers the main attack force's right flank. The HQ stays centrally located to bolster the morale of as many attack units as possible.


The first Japanese flanking squad makes their entrance on the far side of the river. Unfortunately, they guessed wrong and were on the far side of the table from the US main thrust. (We had each side declare which side of the table they would send their flank march before the game began.)


From the Japanese left. The flanking squad is still trying to locate the enemy while the grenadiers with their HQ are about to enter the dense jungle next to one of the fords across the river.


The second IJA flanking squad appears along the near table edge. Things are definitely heating up as elements from both sides are taking (and giving) fire in the center. The light mortars have found their mark and Marines are going down. The US mortar has suffered several losses and is not long for the war.


Marines respond to the flanking forces of the Japanese as a squad and a .30 cal peel off to deal with them while the main attack force continues to bludgeon their way through the Emperor's finest.


Reminiscent of  what was happening elsewhere this same day at Tarawa, the Marines hunker down in what little cover they can find until they can bring their firepower to bear on the enemy all around them. At this point it was looking very sketchy for the Marines.


The grenadiers start to take some heat and a few of them go down.


The IJA takes out one of the .30 cal machine guns. One could say they 'Charleston Chew'ed' it up.


But the light mortars have zeroed in. Air bursts cause massive casualties and the Marines are forced to spring to the attack rather than sit and try to weather the storm. The HQ stabilizes the situation here where the action was fiercest.


One USMC squad heads for the far ford and, along with support from a .30 cal and the flamethrower team, reduces an IJA squad to just a few dudes. In the middle left, the USMC squad takes cover behind a hill to concentrate their fire on one flanking IJA squad at a time.


The grenadiers too, are whittled down. Coupled with the loss of their sniper and 81mm mortar, things are suddenly turning against the Japanese.


Forward! A USMC squad hot foots it toward the ford in the river through the hail of lead from the Japanese MMG from the hill in the upper left.


But their own MMG redeploys and offers covering fire in support. 


Assisted by the medic, and led by two BAR's, the river crossing is a success.


It's a full fledged firefight now as both sides engage along the length of the board. The Japanese are losing more men though, and it's the Marines who are initiating hand to hand!


Uh, just keep yer heads down.


The FT team also crosses the river and puts and end to the remnants of a IJA squad.


An overview of one half of the board. There's a lot less soldiers from both sides but the loss of the IJA MMG and the remnants of the squad to the FT really hurt the Japanese chances.


A look down the length of the river as the USMC sweeps forward.


"We must tell the Emperor"
"No, I alone will tell the Emperor"

And so it ended. The Japanese lost their 81mm mortar, the sniper, their MMG and two squads, while the USMC lost their mortar and one MMG for a 5-2 victory as the clock ended after Turn 6. It could have turned either way but for a few fortunate events for the Marines. For starters, who knew the IJA flank would find no one where they came in? If they come in on the other side, it's going to be ugly. Also, Tony's dice got red hot the last half of the game.

We've never used the Japanese before. They have some fun special rules and as one could guess, they are especially nasty in hand to hand and never back down from a fight. I would like to use smoke to cover their advance and then give the enemy the pointy end! 

We'll see next time. So long!