Saturday, September 17, 2016

Raid on Osgiliath! A LotR Strategy Battle Game scenario

My brother Chris came down for a mid-week game of LotR SBG. We've been playing this game for a few months and loving it, using our old Ral Partha figs from the 70's. For this game we chose an orcish incursion into the ruins of Osgiliath, defended by the men of Minis Tirith supported by Faramir and some Rangers of Ithilien. The Evil side had greater numbers, bolstered by a Mordor troll and 5 Mordor uruks and a 3-2 advantage in shooting. (More on this later.) But, as it worked out, despite different numbers in figures and points, each side had a total of 30 wounds. The scenario called for eliminating 50% of the opposing force to win, but we chose to make it 50% wounds and not figures. For a change of pace, I played the Good side.


BTTE


The battlefield. The scenario called for 8 Good figures to be set up as 'sentinels' in the left 1/4 of the board and the rest of their force in the right 1/4, coming to their aid. The Evil side set up anywhere up to the middle point of the board, starting from the left side as well. (The Anduin River.) The only caveat is that they had to be at least 6" from any sentinel figures.


The 'reinforceing' men of Minis Tirith. I chose to set up in maniples of 4, each with a supporting spearman. Hopefully, they would provide mutual support. The Rangers and Faramir were also evenly distributed. I wanted to be able to be mobile, agile and hostile. This was a mistake. 


The sentinels. They are bolstered with a banner which allows some re-rolls. I could have been a dick and set them up in such a way across the board to deny the Evil side set-up anywhere except along the very board edge but I didn't. I should have. Since when am I not a dick?


Chris, setting up last, wisely set up en masse to destroy my forces piecemeal. The uruks are behind the troll. The orcs on the left, without scimitars, are armed with bows and hand weapons. In perfect 20/20 hindsight, I should have dome the same thing; set up my guys together and forced him to fight all my strength or split up himself and try to out maneuver me. If we were to do this scenario again, I would have Good set up the sentinels, then Evil set up their whole force, then Good set up the remaining troops, but Chris did exactly what he needed to do. He took advantage of my smaller numbers and split archers and charged straight ahead.
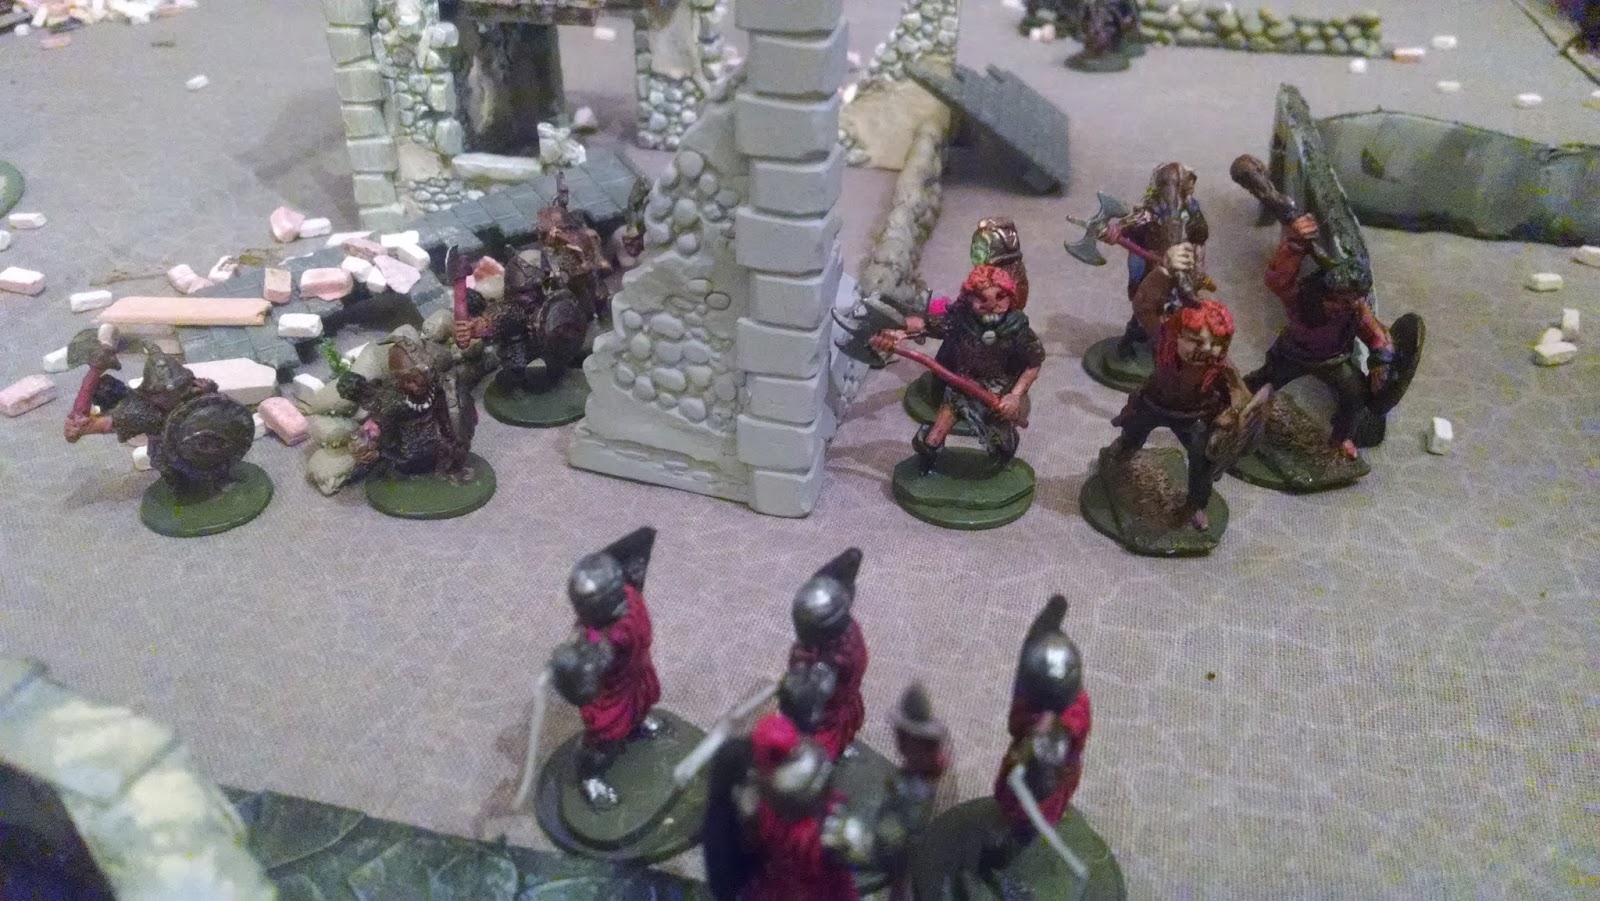

The uruks peel off to deal with my left maniple. These Good guys immediately retreated away as they were witnessing their brothers getting cut down like hay in summer. This allowed the regular orcs to then switch targets and head toward the sentinels where I had the only chance of doing some damage.


The troll gets all up in our grill. You can see I tried to back away the right most maniple to try to scissor his forces. Instead they just got mashed one at a time. But at least I had the troll tied up for a few turns; he would need some pretty nifty rolling to get out of this one!


Well, after some pretty nifty rolling, the troll whacks all three fucking guys. First he won the fight roll, then needing a 5 to kill, he rolled a 5 and 2 6's! 


At the Anduin, the sentinels get aggressive. Eschewing a defensive, 'behind the barrier' posture, they seek to destroy the token Evil resistance and hopefully delay the inevitable.


Meanwhile, back at the ranch, I am forced to push forward two Rangers to clog Chris' center and impede his ingress into my rear. (Always a good thing.) I have also moved my Captain of Gondor into combat with the troll. In the background you can see my right maniple being clubbed like baby seals.


My left force finally returns back to the fray and even Faramir finally gets into the action, since he clearly had rubber tips on all his arrows. We hit the uruks and have the best success of the night against the toughest guys in Chris' force. We whacked three of them. Again, in the background, the orcs are making mincemeat of the few remaining staunch defenders, beating them as if they owed them money. Keep your pimp hand strong.


It almost looked like I had a chance here until Evil's reinforcements came. Ultimately Good only pushed a few orcs back while losing the banner. The banner only helped in one re-roll the entire game anyway. Scratch 25 points which could have bought three more men.


The final positions. Evil will carry this day.


"Go now, and die in what way seems best to you."

Great game, won easily by Chris and his Evil minions. The final count was 15 wounds to 7. Good did manage to inflict two wounds on the troll, but that means we only killed 5 other orcs. Yikes.

A few notes: shooting sucks in this game. Only elves have a Strength higher than 2 with their bows which means it's really hard to wound anyone. In this game, even the Rangers needed 6's to wound, a 16% chance. Granted, they 'hit' easier than common human troops or orcs but what good is that if you can't wound anyone? In my opinion, only goblins and hobbits should have Strength 2 bows. Men and orcs should have a Strength 3. That would wound on a 5 or 6 usually, which seems more congruent with getting shot with an arrow. The range can stay the same; orcish bows not shooting as far as men and elves shooting furthest.
I've already mentioned set-up for this particular scenario. I think a staggered set-up would make for a better game.

Nonetheless, Chris spanked me yet again; taking only about 90 minutes to do so! Great game Chris, well played, thought out and executed!

Sunday, August 28, 2016

Bolt Action, Campoleone, Italy. 17 February, 1944

Met with the gang to play Bolt Action with our special guest of honor; Francois Piche traveling all the way from Rochester New York to play. I can't believe I forgot the team photo!
Anyway, the Game was Bolt Action and the scene was the 2nd day of the German counterattack at Anzio; this action taking place just south of Campoleone. The GI's dubbed this crossing of the road south the 'Dead End Road'. This section of road was the German objective for the day, and the Americans dug in and were historically dislodged after a tremendous day of fighting.


A view of the battlefield. The Germans would enter from the north, or left of this photo, while the Americans were set -up hidden on the right, allowed to be up to 12" from their board edge. We played easy, home brewed rules for being/staying hidden as the rules per se are written for tournament play. Our main objective was to ensure that the Germans wouldn't have 100% intelligence on where the Americans were set up and enter the board accordingly. There was a 3" AT gun out there somewhere in the rubble!


A view from the other side showing the RR cut.


The first of a few shots of the GI's once revealed. They had 4 squads, each with a BAR. They also had 3 MMG's and a medic in addition to the AT gun and the M4 seen here. All together they had about 200 less points that the attacking Germans but had tons of -2 Hard Cover. (That's a good thing.)


Another shot of GI's waiting in Ambush!


The first of the German FJ enter the board. The German strategy was to use superior firepower to blast their way through the center. In game terms, as the German objective was to get through the US set-up area, Victory Points would be awarded thus: For each American unit destroyed, 1 point. For each German unit that ends the game in the American set-up area: 2 points. For each German exited off the American board edge: 3 points. For the Americans, each German unit destroyed: 2 points.


The MkIV comes down the main road while a FJ 81mm mortar gets into the action. The mortar had a spotter but he was whacked on the first shot of the game. Not a good start for Jerry. What that meant was the crew could only shoot at what they could see. Meanwhile, the American AT gun revealed itself in it's position on the hill overlooking the battlefield but luckily missed the MkIV, which quickly skedaddled behind a building.


The Americans advance from their starting point into the rubble in No Man's Land. It would prove to be a potentially dangerous position to hold. (Remember that 81mm mortar?)


The American AT gun gets into the action, firing every turn. They managed to take the head off a guy at about 56 inches or so when, by rolling consecutive 6's, got to choose which guy in the unit got whacked. In fact, 3 out of the 4 German LMGunners were whacked in just this fashion, the fact that we did it wrong by the rules notwithstanding. Behind them, covering the RR cut is a MMG. It did it's job as the one flanking FJ squad was cut down almost to a man without ever firing a shot in return.


The FJ fire base in the center. They have a MMG and the sniper and spotter on the second floor. The MkIV hunkers down, safe behind the building and looks for targets of opportunity. Almost as in real life, the sniper was more of a psychological weapon than a useful one. He garnered a fair deal of American love and attention, while he himself only whacked one member of a MMG team the whole game. The FJ HQ is in the back room of the house. The captain conferred a +3 to Morale and was tried to be kept in the center where he would be needed most.


What was that about being safe behind a building? The M4 has a direct bead on the MkIV and it turns into a gun duel. The American medic in the foreground personified Davout's 1st Corp on June 16, 1815. He kept running between actions and ended up helping no one as he was always in the right place, albeit at the wrong time.


Jerry's advance stalls in the middle. Two MMG's and two full squads with BAR's pin down anything that moves.


The Germans decide to swing to their right with a Wehrmacht squad with 2 LMG's leading the way. Pictured here though, is the FJ assault squad. Armed with their M44's, they prepare to assault anyone on the Dead End Road.


Out in the rubble proved to be too much for these guys and they retreated back to the safety of the Dead End Road. Wrong! An 81mm shell hit in their midst, killing half of them. The rest were dispatched by the FJ assault team, though they took a few with them.


The FJ regroup after close assaulting the remaining GI's. Unfortunately they couldn't get behind any cover and were lucky to survive all shots against them, including 4 from an MMG. Score a total of 3 VP for them! Oh yeah, look who won the gun duel. 


A few shots of final positions. On the last turn, after the AT fired and the M4 destroyed, the MkIV got brave and despite moving at double speed, ended up 1/2" short of the set up area and 2 VP. He did score one when he knocked out the M4 though.


Looking down the Dead End Road. For a lotta guys, it was aptly named.

So, this game kind of proved the adage 'It's better to be lucky than good'. The score was a lopsided 7-0 for the Germans. On paper at least. In reality, it was a near run thing. For instance, the Wehrmacht managed to survive Close Assault with only the NCO remaining. At that point the score was 3-0. Then the Germans get the first card and he exits off the map making it 6-0. If the first card is American, he is almost certain to bite it and the score is instead 3-2. Same with the tanks. It was simply a matter of who went first and rolled higher. If it goes to the Americans, it's  3 point swing in their favor. And it must be mentioned that about three German units had 3 or less guys when the game ended!
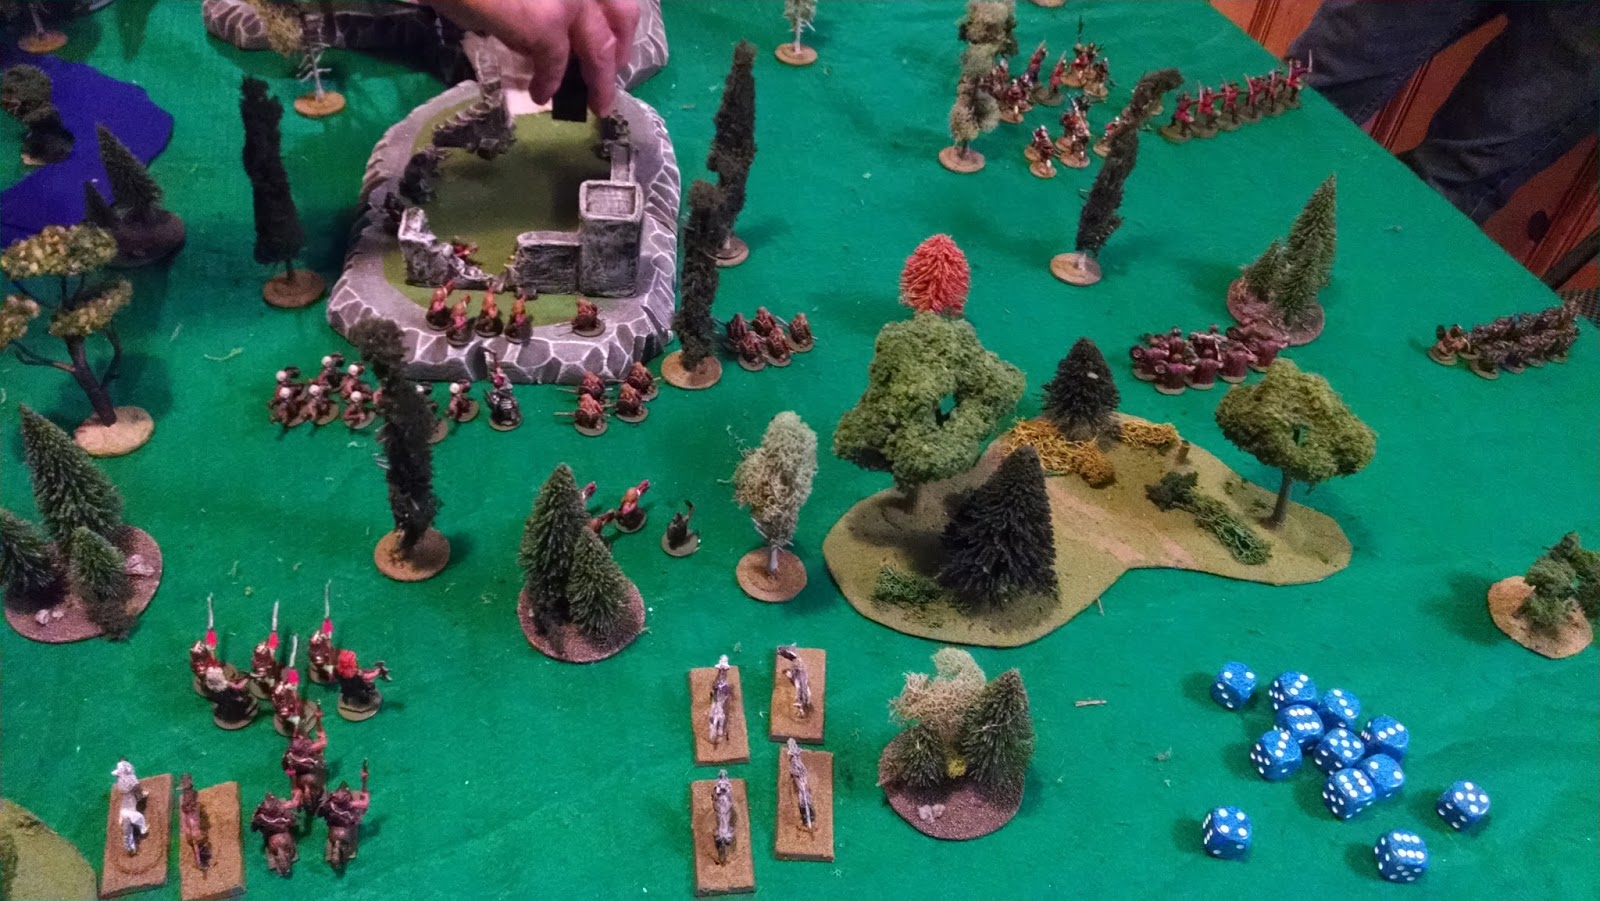
But once again, I had a great time and thanks everyone for coming over and supplying me with a few pictures as well. So long.

Saturday, July 2, 2016

Drums along the Monongahela

Played a good game of Muskets & Tomahawks with the old gang recently. It was an intro game as I was the only one to have played the game. The scenario centered on a mixed British force tasked to burn down a French settlement before it was completed. The French had to kill/rout 2/3 of the British force. I really wanted to use the new blockhouse I made but there are no rules for them in the book, so we made what seemed like reasonable rules for defense factors and had at it.

The whole shebang.

The blockhouse. I tried to make it look like the stockade was still under construction. The 'logs' and 'stumps' in the foreground are just sticks from the yard.

I think this is my favorite shot of the day.

The Brits were to enter along the long side on the right and the two short sides. The French started with the garrison (regulars) in or within 4" of the buildings with their reinforcements entering along the road to the left.

Stockade under construction.

A unit of British Rangers (who would be the MVP's for the Brits), flanked by two units of Indians. Sadly, the Indians quickly vaporized from the first few volleys from the French regulars. 

French Indians. The three guys in the foreground are actually running form British fire while the others are advancing through the meadow from off board.

My pink coats enter. (They are actually quite red in real life.) You can see Indians and more Indians advancing in the background.

French chasseurs take aim.

Indians fire.

The other British Rangers use the terrain to their advantage. The French fire from the blockhouse was murderous. In the background you can see Pennsylvania militia wandering through the woods. We played almost three hours and they never got out as they wandered in circles, lost in a  patch of wood the size of my back yard.

Indians from both sides square off as fire from French regulars pours out of the small building in the back. The French Indians are bad news and no mistake. Being 'bloodthirsty', they re-roll all misses in hand to hand combat. Yikes!

The French Indians close but are about to be rebuffed by a volley at Point Blank range. In the background you can see the British regulars and what's that? Looks like Pennsylvania militia lost in the woods.

The pink coats engaged the French regulars all day in the blockhouse to very little effect.

The Rangers light the first building!

The lone French Regular on this side runs from the burning building.

The Rangers set the second building aflame. They've retreated to a safe distance and take aim at the Canadian militia running out of the building.

We carried the ammo, we might as well use it. The Pennsylvanians finally extricate themselves from the woods and go, decidedly, home.

It was a near run thing as some general once said. The Brits got two buildings alight but, once lit, needed to roll a total of 8 pips to actually destroy them before the game ended. They ended up with 7 on one and 6 on the other! The game also uses subplots to help determine a winner. The French achieved theirs, which was to keep a certain officer alive and Brits failed in theirs, which coincidentally, was to kill the very same officer. (There are actually over 40 different random choices of subplots. It was just a wild coincidence that they were related for this game in this way.) The British had wiped out over half the French but they passed their Morale checks. So, it was a Major French victory but very close to being a Minor British. Either way, I think everyone had a good time.

Sunday, June 5, 2016

Battle of Five Armies. Take 2

We met again to test this scenario one more time. I was tempted to switch sides (I haven't been the Good player yet in any of our games), but I more wanted to try a few different tactics for the Evil side. Plus, it's fitting and congruent with our overall nature for me to be Evil and Chris to be Good. Natbud joined us as did Ogre Dirty Dog (Craig) in a 4 man brouhaha. Craig and I decided that. tempting as shooting is, is isn't the way Evil is going to win this scenario. Needing 5's or 6's to hit (vs, 3+ for the Elves and 4+ for the dwarves and men), plus needing 6's to kill the dwarves, it just doesn't make sense to enter into a bow fight with them. With that in mind, the new Evil strategy was to move forward the first two turns and then stagger our archers, with every other goblin firing and the others moving full speed. (The rules say a model can only shoot if they move half their rate or less.) Last time we spent turn after turn pouring arrows into defensive positions and barely moving. The rules also make you roll a die for every intervening model, tree, wall or other obstacle with a 50% chance of hitting them/it instead. Couple this with the poor shooting stats and you can see why we eschewed that option.
I was also determined not to make the same mistake in set up as last time. I think it's important to slow the elves down on the western half of the board but I committed far too many troops (and the wrong kind) to it last game. The Elven archers, with their superior range and shooting ability can definitely cause major problems for the Evil side. They especially, needed dealt with.
The plan was to use the wargs and some archers to impede their progress and use overwhelming numbers to pour into the fort.
I didn't take as many pictures this time around, wanting to focus more on the tactics behind our efforts. Plus, yinz seen it last time.


Here's the board after the first Evil turn. You can clearly see the different approach. Ogre's boys are on the far right, waiting to give the Men of Laketown the business end of their pointy bits. The greater part of two other clans are massed in the middle, about to take the shortest route to the fort. I started with 6 archers to the west of the stream and on the Elves' entry, they whacked 4 with their first shot. I was very nervous at this point. Luckily for the Evil side, Good's dice went down hill from there, especially Natbud's. It's always better to be lucky than good.


Turn 4.  Evil is already threatening to enter the fort. Ogre has craftily divided his clan into shooters and non-shooters. His massed archers squared off against the boys from Laketown and consistently wore them down.* (*See Natbud's shitty dice, above.) Finally, on Turn 6, he scored 5 hits and wiped out the last 5 archers!!! This also forced a Courage Test which their leader, Anglo, failed from inside the fort and a 2 point VC swing Evil's way. The wargs have divided, with part going to block ingress of the men on the east side and the rest, with riders, to do the same on the west against the Elves.


I entered 12 wargs on the west edge to cut off the Elven advance. Once again, though, I couldn't resist jumping on them, especially the archers. With more wargs heading for the head pf their column, I reasoned it was better to go after their archers to keep them from harassing the left flank of the main assault. Eventually we killed a bunch, actually causing a Courage Test, but more importantly, we just kept engaging them do they couldn't shoot. (Troops already engaged in melee combat need not take the Courage Test, so though we forced one, all the Elves were engaged and never took one.)


Evil muscles their way into the fort. In the bottom center, 2 Evil heroes gain purchase on the walls before leaping in. It took a 4 Hero Might roll off to finally decide who got to move first. Luckily Evil prevailed which allowed a mass intrusion into the fort. By engaging most of the Good models, it also negated thei ability to move to plug gaps and holes. You can see my troop of 6 orcs got into the fray this time. Their two handed weapons cleaving a few dwarves in the process. The dwarves are so tough though! Most are just pushed back, but that was enough for our purposes. In the top center, you can see Anglo before he thought better of the situation and thought he heard his wife calling. Ogre's clan, with a few reinforcements from the center smash the Men of Laketown like they owed them money. He has swung some goblins round to enter the rear of the fort. Only two men, plus Anglo, were able to get in.


The wargs whittle down the Elven archers. After their first volley which cut down 4 goblins, I am not sure they ever got to fire again.


The Elven advance is halted as wargs and warg riders cut them off before reaching the fort. A few wargs have also disentangled themselves from the archers to hit the Elves in the rear. (Just the way they like it!) Their long scrotumed leader was tough though! Facing up to 6 attacks per turn, Evil could not lay even a single wound on him.


Get 'em, you dogs! Ablaat, goblin hero, stands in the breach, supported by spearmen. (Uh,.. speargoblins?) The orcs lend their two handed assistance. Booglin, one of the other goblin heroes, can be seen in the center right, just inside the fort, with the green hair and red helm. He blew his Fate point trying to save a wound and on the next to last turn, Nat had two chances to finish him off, but failed. With Evil getting Priority, he ran and hid in the corner on the last turn. (You can see him putting a wall of goblins between him and harm in the lower left in the photo below.) Thus another 2 point swing in Evil's favor.


The final positions. Evil has two heroes and 3 clans in the fort for 7 VP. (This time, instead of being out by a half inch, we got a warg rider in by half inch for a point. A deliciously sleazy move on the last turn. He can be seen in the center left of the pic.) Good has a Hero, and two factions (men and dwarves) for 4 VP. The Elves are stymied on the west side, while Ogre mops up what's left of the Men on the east. A very close game once again with wild point swings on the last turn.
The whole game had some wild swings back and forth, especially with Priority changing hands so many times. Both sides fluctuated from acting to re-acting almost turn to turn. There were no tactical gaffs on either side and, all in all, very well played. Once again, on the last die roll of the game, an orc cleaved a dwarf from gullet to gonads. Nice to end with a '6'.
Well Done, Men. Chris, great scenario!